Showing posts with label Beautify Your Blog. Show all posts
Jun 30, 2010

Day Eight :: How To Make A Button {that links back to your blog}


You thought I forgot about this series!  It has been awhile...I think this pregnancy has made me a little lazy, or tired, or something along those lines {or both}.  Add recovering from a week away, and starting a new business, which doesn't leave as much time for blogging as I would like.  :)

So back to our topic...10 Ways to Beautiful Your Blog.  If you haven't seen the previous steps, you can find them here...

1. Find a layout you love
2. Post LARGE pictures
3. Peek-a-boo NAVBAR
4. Create photo collages
5. Add a FAVICON!
6. Background Patterns
7.
Change Your Font
8. Create a Button!


Today I will explain how to make a button that links back to your blog.  A button is simply a picture or icon that you can click and it will direct you to whichever website you choose. Often you see them when people show they were "featured" on another blog.

So you can have one of your own!  And if you want to increase traffic, you can always switch buttons with a friend and "advertise" your blogs for each other.  Or whatever.  I experimented with making a few and you can see them on the bottom right part of my blog.  Not everyone may be interested, but for those who are...

Here are the steps.

1.  Make an image you want to use for your button.  This can be any mix of text, pictures, whatever.  If you need ideas, look around.  I've found the easiest way to do this is with either an advanced photo editor or a paint program.  You can to make sure your image's width is around 200 pixels.  Most people's buttons tend to be square-ish.  Save this as a Jpeg.

2.  This step has been on about every "beautify your blog" post that I have done, so I'm sure you're now familiar...Upload the image on Picasa, Flickr, Photobucket, etc.  Make sure to make note of the image's url (this should end with .jpg).

3.  Ready for this?  Create an html gadget on Blogger.  To do this, simply go to "design" (used to be called layout), then "add a gadget," and choose "html/javascript."  Then you will want to paste this into the html box, replacing YOUR BLOG'S URL with your blog's url {for example, mine is www.BambinaBabe.blogspot.com}, and YOUR IMAGE URL with your image url from where you uploaded your image.

;

Also, I've chosen a width of 200. If you would like yours wider or narrower, you can change the number 200 to whatever number you would like.

Good luck! I hope this works for you!  Enjoy and share...and feel free to link back to this blog if you use these steps.  :)

Apr 28, 2010

Blog Design Tip #7 :: Change Your Font ::


Wow, we are already on the seventh tip for our 10 Ways to Beautify Your Blog series.  Thanks ya'll for trying all these tips out with me!  Like I said, I've learned many of these things by trial and error.  Hopefully some of these things are working for you, and you aren't getting too much error!  
So far, we have learned to...

1. Find a layout you love
2. Post LARGE pictures
3. Make a peek-a-boo NAVBAR
4. Create photo collages
5. Add a FAVICON!
6. Add a background Pattern

And tip number seven is...change your font.  This one's an easy one, I promise!  Blogger gives a few options for six fonts, but if you want to use a different font, I will give you simple instructions.  Trust me, this one's simple. 

1.  First step, go to Layout>Fonts and Colors.  Change all of your fonts (using the Blogger method) to Arial.  Don't panic, this is not the font you will be using.   This just makes it easier to do step #2.  :)

2.  Second is the fun part.  Pick your font.  The best way to do this is to open a Microsoft Word document, and look at the fonts listed.  Here's the tricky part though...whichever font you choose needs to be a font that is commonly used on most computers.  This is because if you choose a font that exists on your computer but not on other people's, the new font will only show up on computers that have that font, so not everyone will see the changes.  Does that make sense? 

3.  Next, go to Layout>Edit Html.  Now you will want to replace every word that says "Arial" with the title of your new font.  For instance, I replaced the word "Arial" with "Century Gothic" for most of the font changes on my blog.  Some other fonts I like are "Bookman Old Style," "Comic Sans MS," "Garamond," "Lucida Sans," and "Tahoma" for just a few ideas. And you don't have to use the same font for everything...for instance, you can make your "post title font" different from the rest of the blog's fonts. 

A super easy way to do this without squinting at your html (and loosing your eyesight looking for the word Arial) is to go to the top of your browser where is says "Edit," then "Find."  Type in the word you are looking for (arial), and your computer will highlight the word arial, then click "next" and it will go right to the next one. Replace as you go along.    

4.  Step four, just hit "preview" to make sure you like the changes.  If so, save your new template.  I told you it was easy!

Good luck and feel free to post a link back to my blog if this works for you.  :)   And before I go, I just have to post a few pictures of my sweetie on our millionth walk to the park. 


♥ nealy
Apr 23, 2010

glitches + a few random tips


I'm so sorry, I think I had some glitches in the codes I've been giving to you!

  • I got a few messages that nothing was happening when you tried following the tutorial for background patterns.  I think I've fixed it, so let me know if it still doesn't work.  

  • A friend asked me to add a favicon to her blog.  My own instructions didn't work for myself!  So sorry if you tried for 40 minutes and still didn't get it.  :)  You're not crazy (but maybe I am)!  So if you still want to add a favicon, that code is fixed now too.  God has a humorous way of keeping me humble, again and again.  ;)

A few other things...

  • If you want to add large pictures, here's a new (and easier) way that I learned from an anonymous commenter.  "Go to settings, Under the Basic tab scroll all the way to the bottom under Global settings and click on "Updated Editor". Then from there you will download your pictures straight to your blog and it gives you the option to make your pictures a tad bit bigger than what you're posting them as now."  Thanks so much for the tip, I wish I could give you credit!  :)
Now if you still have trouble with anything, please let me know and I will see what I can do.  :)  And wow, thanks to b + k for the amazing compliments.  :) 

Have a great weekend!

Apr 22, 2010

:: How to Add a Background Pattern :: Tip #6

Adding a background pattern to your blog can be done in just a  few easy steps.

1.  Find a pattern
2.  Upload it
3.  Add it to your blog's HTML


1.  Find a pattern.  Patterns can be any size, but smaller works best so your page doesn't take too long to load. Keep in mind that it will repeat across your background, so it must be seamless (ie, when the pattern repeats, it will look continuous).  Patterns can be found anywhere online, on your computer, or you could make your own.  A site that I really like is Pattern Coolor.  It's essentially a pattern generator, and the colors and sizes can all be personalized and downloaded. Now that you've found a pattern, save it on your computer.
 
2.  Upload it to an image hosting site (like Picasa or Flickr).  Then you want to remember the photo's url address.  Here's my current pattern so you can see what it will look like.


3.  Edit HTML Next you want to edit your blog's HTML by going to Layout>Edit HTML.  Find where it says this:


Now replace all the above with this following code. 


4.  Replace   Don't forget to replace your photo's url wthere is says YOUR PHOTO'S URL - keep the parenthesis.  Now hit preview and make sure it shows your background pattern. 

Hope this works!  Have fun and feel free to link back to my blog.  :)  Let me know if you have any problems with this too - I would be glad to help.  

xoxo
nealy

**updated post**

If the above directions aren't working for you, sdouble check that your image you uploaded starts with "http" and ends in either .jpg or .png.

Here are some alternate instructions you can also try.  Find the body section and paste url(YOUR PHOTO'S URL) where it's shown below.


Good luck!
Apr 14, 2010

Next Blog Design Tip...How To Add a Favicon to Blogger!

'We're back!

Thanks so much for joining me on this series of 10 Ways to Beautify Your Blog.  So far, we have learned a few basic things such as...

1.  Find a layout you love
2. How to post LARGE pictures on your blog
3.  How to make your NAVBAR disappear, and
4.  How to make photo collages by Steph

My next tip is one of my favorites.  It is...How to add a FAVICON to a blogger blog!  It's really not too difficult and is a fun way to personalize a blog or website.  I've learned this pretty much by trial and error, so if you have any extra tips or simpler ways to do this, please let me know. 

What is a favicon, you ask?  It's the words "favorites icon" shortened into one word.  It's the little symbol that you see to the left of the address bar; blogger blogs come with an orange "B."  For instance, last night I added a pink heart as my favicon. 

Here are the three steps to add a favicon to your blog.
 1.  Create a favicon
2.  Upload it to an image host
3.  Edit the Blogger Html to add your personal favicon

Create a Favicon
Create a picture, symbol, or letter that is 16x16 pixels and save to your computer as a .png or .gif document.  You can use fonts, clip art, photos, anything.  A photo-editing program, or even a simple Paint program, should do the trick.  There are also favicon-generating websites you can use that will give you a favicon already made (Favicons R Us, FreeFavicon.com, etc.).  These sites will give you the icon as a .ico file that works as well.

Here's what my favicon looks like.  Besides shapes or symbols, you can do a monogram or the letter of your last name. 


Upload
The next step is to simply upload the file to an image hosting site (picasa, flickr, etc.).  After uploading, you need the photo's url address.  If you uploaded a premade .ico file, you may need to find another image hosting site that can support that type of file (try HostAnyImage). 

Edit Your Blog's Html
This step has to be done just right.  Go to Layout>Edit Html in Blogger.  Look for  /head (with the arrows around it).  An easy way to search is to go to Edit, then Find, and you can type the word you are looking for and it will highlight it automatically on the page.  Next, you will paste the following code right before the /head section.


You will substitute your photo's url (should end in .gif or .png) for YOUR-FAVICON-URL.  Preview and then save!

I hope this helps!  Let me know if you have any comments or questions.  Share and enjoy!  Let me know how it works!


And stay tuned to learn how to make one of these. 


P.S. We are having some friends stay with us this weekend and I am needing some good dessert recipes.  Any ideas???
Mar 31, 2010

Day Four :: Picture Collage Tutorial :: by Steph!

beautify blog 
I have a guest blogger today!  Thanks so much to my amazing friend Steph for sharing her secrets with us on how to make picture collages. If you read her blog (and I'm sure many of you do), you know how super talented she is.

I think you will enjoy these tips from her on making photo collages!  

*     *     *     *     *

We’re back with the fourth day of 10 Ways to Beautify Your Blog.  I have to be honest – when Nealy asked me to be a “guest blogger” on this series I actually thought to myself “Is she crazy!!!!?”  I’ll be the first to admit that I really don’t know anything about blogging. However, I think I might be correct in saying – neither do you.  Am I right?  If so – that’s great.  We’re in the same boat.  I’m sure we can learn a thing or two from one another.

Today I’m going to show you how to make a photo collage for your blog.  For those of you who follow my blog – you probably have noticed that I do a ton of collages.  I love finding creative ways to illustrate a blog post using multiple photos.   And what’s great about a photo collage is that it’s actually VERY easy.  And everyone needs a few more easy things in their lives, right? 

Couple things before we begin.  I use Adobe Photoshop CS3 for all of my design needs.  Now I know it’s probably safe to say that not everyone is willing to shell out the nearly $400 needed for this software (neither did I – I’m just fortunate that my work bought it). The great news is that there are a number of FREE (yes – free!) software programs out there capable of doing what Photoshop can do.   Here are just a few (Nealy – make sure the program you use is on this list and if not please add it):

1. Gimp - Gimp works across several different platform (Linux, Mac, Windows, FreeBSD, Sun OpenSolaris) and is perhaps one of the best free alternatives out there so far.
2. Paint.netpaint.net - [Windows only] This photo editor runs on Windows. It has a large and growing community of users, with lots of tutorials.
3. Seashore - [Mac only] Seashore is an open source image editor for Mac OS X’s Cocoa framework. It features gradients, textures and anti-aliasing for both text and brush strokes. It supports multiple layers and alpha channel editing. It is based around the GIMP’s technology and uses the same native file format.
4. Inkscape - Inkscape is an open-source vector graphics editor similar to Adobe Illustrator, Corel Draw, Freehand, or Xara X. What sets Inkscape apart is its use of Scalable Vector Graphics (SVG), an open XML-based W3C standard, as the native format.
5. Chocoflop - [Mac only] ChocoFlop is an image editor for Mac OS X, based on the CoreImage technology. It is currently in beta stage and available freely.

So back to the task at hand.  The following instructions are for Photoshop users; however, I’m sure there are very similar functions available in the above software programs. 

Step 1. Open Photoshop and click on File. Click Create New Document and enter the height and width measurements you want for your collage. For my blog  I often do something like a 4x5” collage with a resolution of 300 dpi.

Step 2. Click on File again and then Open. In the browser window, select the photo you want and click Open. The photo you selected should open in a new window.

Step 3. Drag and Drop the new image into the original document. If the image needs edited, use the marquis tool to create the border where you want it. Click on Image and then Crop. Use the Free Transform tool to size your image. When you are satisfied, place the image where you want it on the page. Follow Step 2 to open the next picture and continue to do this until all your images have been added and placed.

Step 4. Once your images are in place, you can add text (I recommend using two fonts and a drop shadow to the text to make it pop) or any other graphics or borders you have stored by opening a new layer. You can also use the tools on the palette to erase, blur or add extra color to your collage.

Step 5. When you are finished with your collage and are sure you no longer want or need to make any changes, click on Layer in the toolbar at the top of the page. Click on Flatten Image. This will reduce the size of your file, but will also remove all the layers which will limit your ability to make any changes. Click on File and then name and save your document in the format you want in the appropriate folder in the browser window. (in most cases I save my collages as .jpeg files)

Here’s an example, - I wanted to put together a collage of some of the details Nealy captured at Callie’s birthday party.  I chose 4 of my favorite photos and was ready to begin.

First I created a new file in Photoshop, opened all of the appropriate image files and arranged them to my liking. At that point I was left with this…


Next I knew I wanted to have some sort of border on all of the photos.  So I chose a White Stroke of 5 pixels wide. I applied that to all of the photos…


And lastly, I wanted to add text to finish out the collage.  I usually try and use a couple different fonts to all of the collages I make just to add a little dimension.  (For free font’s – check out KevinandAmanda.com)


And that’s it!  I hope this was helpful – feel free to email me with any questions you may have.
Feb 24, 2010

Day Three: Make Your NavBar Disappear!


If you use blogger, you have something called a navbar at the top of your blog.  Some people like the navbar because it can be useful to search "log-in" to blogger.  However, if you are wanting your blog to look a little more custom, there a number of things you can do with it.  You can remove it, make it hover only when your cursor is over it, or make it transparent.    These are just minor tweaks, but they can make your blog feel less "standard." 


Hover or Peek-A-Boo

1.  Go to layout, then Edit Html.

2.  Place the following code between the "head" and "/head" section as well as before the beginning of the CSS section


3.  There you go!  You NavBar now will only show up when your curser runs over it.

(credits)

Remove

1.  Look for this tag: < / head >.
2.  Paste this script immediately above that tag:


(credits)


Transparent
I also noticed that you can make the navbar transparent (I just tried this on mine).  To do this, go to "layout," "page elements," then "edit" on the far right corner of your navbar.  Select "transparent light."


Have fun!
Feb 3, 2010

Day Two: How to Post LARGE Pictures On Your Blog

beautify blog

We're back with the second day of 10 Ways To Beautify Your Blog. Today I will explain how to post pictures to your blog that are larger than what blogger will allow. I love LARGE pictures; it is fun to see the details in photos.

Here's a picture that I've uploaded using blogger's format (I've chosen the options "large" and "center").


And here's the same picture, made as large as the width of my column.

IMG_3547r

Ready to learn how to do it? It's actually pretty simple! There's quite a few different ways you can approach it, but I will explain one of the simplest {in my opinion}.

1. Resize the image you want to upload so that it will be not wider than your blog's main column (you can use any photo editing program). For example, my main column is 550 pixels, so I resized my image to be 550 pixels wide.

2. Go to your favorite image hosting site: Flickr, Picasa, Photobucket, etc. Upload your new resized photo there.

3. Copy the url/direct link for your photo {it will start with http and end with jpg}

4. Start a new post and click the "edit html" tab. Then you want to paste the following code, with your photo's url where is says http://www.yourimageurl.com, exactly like you see it here.


5. You can now view your large picture when you go exit "Edit Html" and go back to the "compose" mode on blogger.

That's it! That wasn't too difficult!

Now if you are wanting something a little more challenging, I will explain how to post an image from another website without having to upload it to a server, and also how to easily adjust the image's size.

1. Right-click on the photo you want to use and click "Copy Image Location."

2. On your "Edit Html" tab in blogger, type the following code


3. Replace http://www.yourimageurl.com by pasting what you just copied over it. Your image will now show up in compose mode, without having to upload anything!

4. The width can be adjusted by changing the number 550 to whatever you prefer.

For instance, I just made these puff pastry cheese twists for Callie's party from a recipe I found on a blog. So, I am going to right click and copy the image's location. Then I will paste it as described in step #2 above in my "Edit Html" tab. And wallah! There it is. I doubt she will be erasing images on her blog anytime soon, so I think I'll be safe without uploading it to my server.


Image credit: HomecookinginMontana.blogspot.com

Now a few things about this...
  • Some websites will not keep their images on their server forever, so you may want to only do this with websites you think will not be changing their images very often.
  • Always site your sources when they're not your photos (I haven't always done this but try to remember to do it now)
  • You can also do this to reuse pictures on your own blog you don't want to upload twice.
Have fun and share! Feel free to ask me if you have any questions and I will try to help.
Jan 20, 2010

10 Ways to Beautify Your Blog: Day One

beautify blog

Finally, it's here! Ten Ways to Beautify Your Blog.

Sorry it's taken me forever. And thank you to everyone for your encouragement. Things have been busy lately, and then our laundry room flooded. So some guys came {restoration company} and ripped out our floors among other things. We have huge fans blowing 24-7, and I can't even hear my phone when it rings. Or the baby when she cries. Or the doorbell. But we're surviving! As if I didn't have enough house projects going on!

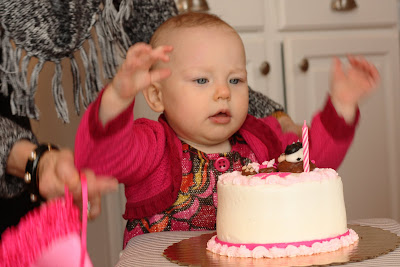
Oh, and did I mention that someone's turning ONE on Sunday?!?!


Okay. Ready? Day one.

Disclaimer: I'm no expert and hope I do this justice, so let's just say I'll just tell you everything I know. I've learned through trial and error, and from just playing around. And if anyone wants to add to more ideas via comments, feel free!

1. Find a layout you love.

This may seem easy and pretty self-explanatory, but the reason I am making this DAY ONE is because oftentimes changing the layout will cause you to lose EVERYTHING ELSE, so make sure you have a great layout that you will want to use for awhile before moving on to day two {if I ever get there}. Keep in mind that colors, fonts, and background designs can all be easily changed without changing your layout. I will show you more of that stuff coming soon.

Some great free layout sites (for Blogger) that I know of are:
These layouts have options such as one, two, three, and multiple column design. However, choosing a three-column layout will cause your center column to be smaller. Wide center columns are nice because then you can post BIG pictures (how to post big pictures coming soon). :) On the other hand, a one-column template would be great if you are into photography and want to display super large pictures.

How to Get a Link Bar
I've gotten some questions about how I got the links on the top of my blog. There are a few ways to do this. First, you can choose a layout that has links as part of the design {that's what I did}. Second, you can actually add your own links to any blogger layout {thanks, Lena} by following these directions:

1. Go to layouts, then page elements, then Add a Gadget {the gadget under your header that's super wide}.
2. Choose HTML/JavaScript
3. Paste this for each link you want to add

4. Fill in "yourlink" with the website you want your link to take you to, and LinkName is the name
5. View it in rich text to play around and make it look pur-ty

Hopefully this has given you a few ideas that you can play around with. If you're afraid to dive in and try a whole new layout because you don't want to lose your old one, you can always start a new "test blog" that you can try new stuff out on first. Just a thought.

Let me know if any of this is helpful! I would love to hear your feedback.

Lots of fun stuff coming soon!
♥Nealy


*Our Blog Templates can be tricky to download. Here are the steps I did that worked for me with this website:
1. Choose a layout, then click download
2. When the window opens where you must decide to "save file" or "open with," choose"open with," and then find WORDPAD.EXE, and click "ok." A wordpad document will open up.
3. Copy and cut this whole document.
4. On blogger, go to the "layout" tab, then "edit HTML, and paste the entire wordpad page
5. Make sure to preview before saving and if you don't like your changes, click "clear edits"

**
As for BTemplates, downloading this worked better if I saved it to my computer, then used the browse/upload feather from blogger. However, you you will have to back-up your old template first if you don't want to lose it (I don't think the "clear edits" option works this way).


Blog Template by BloggerCandy.com