We're back with the second day of 10 Ways To Beautify Your Blog. Today I will explain how to post pictures to your blog that are larger than what blogger will allow. I love LARGE pictures; it is fun to see the details in photos.
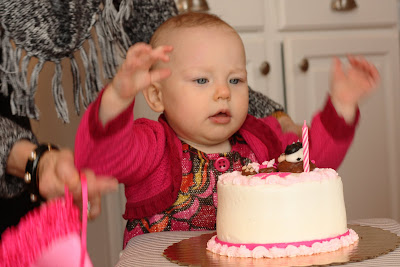
Here's a picture that I've uploaded using blogger's format (I've chosen the options "large" and "center").

And here's the same picture, made as large as the width of my column.
Ready to learn how to do it? It's actually pretty simple! There's quite a few different ways you can approach it, but I will explain one of the simplest {in my opinion}.
1. Resize the image you want to upload so that it will be not wider than your blog's main column (you can use any photo editing program). For example, my main column is 550 pixels, so I resized my image to be 550 pixels wide.
2. Go to your favorite image hosting site: Flickr, Picasa, Photobucket, etc. Upload your new resized photo there.
3. Copy the url/direct link for your photo {it will start with http and end with jpg}
4. Start a new post and click the "edit html" tab. Then you want to paste the following code, with your photo's url where is says http://www.yourimageurl.com, exactly like you see it here.
5. You can now view your large picture when you go exit "Edit Html" and go back to the "compose" mode on blogger.
That's it! That wasn't too difficult!
Now if you are wanting something a little more challenging, I will explain how to post an image from another website without having to upload it to a server, and also how to easily adjust the image's size.
1. Right-click on the photo you want to use and click "Copy Image Location."
2. On your "Edit Html" tab in blogger, type the following code
3. Replace http://www.yourimageurl.com by pasting what you just copied over it. Your image will now show up in compose mode, without having to upload anything!
4. The width can be adjusted by changing the number 550 to whatever you prefer.
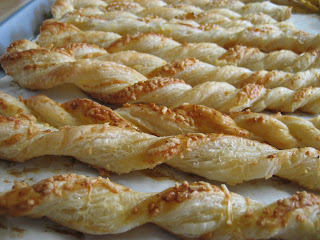
For instance, I just made these puff pastry cheese twists for Callie's party from a recipe I found on a blog. So, I am going to right click and copy the image's location. Then I will paste it as described in step #2 above in my "Edit Html" tab. And wallah! There it is. I doubt she will be erasing images on her blog anytime soon, so I think I'll be safe without uploading it to my server.

Image credit: HomecookinginMontana.blogspot.com
Now a few things about this...
- Some websites will not keep their images on their server forever, so you may want to only do this with websites you think will not be changing their images very often.
- Always site your sources when they're not your photos (I haven't always done this but try to remember to do it now)
- You can also do this to reuse pictures on your own blog you don't want to upload twice.


2 comments:
Thanks! I'm looking forward to when you share about how to make a picture collage. I tried it on picasa where I store all my pics, but it wouldn't work for me for some reason.
Stef in MN :)
Hello! Your blog is great! However, I have a much easier way to enlarge your pictures with blogspot. It's way easier than what you're doing now.
Go to settings, Under the Basic tab scroll all the way to the bottom under Global settings and click on "Updated Editor". Then from there you will download your pictures straight to your blog and it gives you the option to make your pictures a tad bit bigger than what you're posting them as now. This is way faster and so simple!
Post a Comment