Apr 30, 2010

A Simple Equation

Mommy was at the computer.  Callie was being so good.  And quite.


Too good.


And too quiet.  


Callie came up to mommy and handed her a crayon.  A green crayon.  Mommy wondered...


She was right.


This was a first.  Crayon on the furniture.  She never expected that an Easter basket present could turn out like this.


And this.


A simple equation.  White couch + green crayon + quiet toddler + mommy on the computer = trouble.


Not only on the white couch, but on the window sill, on the walls, and on the closet doors (look closely and you can see there is crayon all along the window sill).


Lesson learned.  I'm hiding the crayons.  Magic eraser, I sure hope you take off crayon! 
Apr 28, 2010

Blog Design Tip #7 :: Change Your Font ::


Wow, we are already on the seventh tip for our 10 Ways to Beautify Your Blog series.  Thanks ya'll for trying all these tips out with me!  Like I said, I've learned many of these things by trial and error.  Hopefully some of these things are working for you, and you aren't getting too much error!  
So far, we have learned to...

1. Find a layout you love
2. Post LARGE pictures
3. Make a peek-a-boo NAVBAR
4. Create photo collages
5. Add a FAVICON!
6. Add a background Pattern

And tip number seven is...change your font.  This one's an easy one, I promise!  Blogger gives a few options for six fonts, but if you want to use a different font, I will give you simple instructions.  Trust me, this one's simple. 

1.  First step, go to Layout>Fonts and Colors.  Change all of your fonts (using the Blogger method) to Arial.  Don't panic, this is not the font you will be using.   This just makes it easier to do step #2.  :)

2.  Second is the fun part.  Pick your font.  The best way to do this is to open a Microsoft Word document, and look at the fonts listed.  Here's the tricky part though...whichever font you choose needs to be a font that is commonly used on most computers.  This is because if you choose a font that exists on your computer but not on other people's, the new font will only show up on computers that have that font, so not everyone will see the changes.  Does that make sense? 

3.  Next, go to Layout>Edit Html.  Now you will want to replace every word that says "Arial" with the title of your new font.  For instance, I replaced the word "Arial" with "Century Gothic" for most of the font changes on my blog.  Some other fonts I like are "Bookman Old Style," "Comic Sans MS," "Garamond," "Lucida Sans," and "Tahoma" for just a few ideas. And you don't have to use the same font for everything...for instance, you can make your "post title font" different from the rest of the blog's fonts. 

A super easy way to do this without squinting at your html (and loosing your eyesight looking for the word Arial) is to go to the top of your browser where is says "Edit," then "Find."  Type in the word you are looking for (arial), and your computer will highlight the word arial, then click "next" and it will go right to the next one. Replace as you go along.    

4.  Step four, just hit "preview" to make sure you like the changes.  If so, save your new template.  I told you it was easy!

Good luck and feel free to post a link back to my blog if this works for you.  :)   And before I go, I just have to post a few pictures of my sweetie on our millionth walk to the park. 


♥ nealy
Apr 27, 2010

A Little Monkey

I think my daughter's been turning into a little monkey.  She's climbing on every possible surface.  Especially plastic trucks and plastic horses. 


Do you rotate your kids' toys?  I just started a rotation with our upstairs and downstairs toys.  It's such a lifesaver!  Why haven't I done this sooner?


The little monkey is also jumping on the bed climbing on the chairs. I spy some raisins in her hand, too.  She loves them...and probably will until she realizes they're actually healthy. 


On a totally unrelated note, I entered PW's photography assignment for the first time. The category is landscapes. 


I took this in 2007 with our little point-and-shoot camera.  Kyle and I were in Santorini, and all week I had been wanting the perfect "calendar" shot.  We got a bunch of great pictures, but not quite the one I was imagining.  We stopped at a little cafe in the town of Oia for a bite to eat.  I ran to the bathroom (it was cramped and hot), then came out and he went in next.  He came out and said, "Nealy, did you look out the window?!?"  No, I hadn't.  I went back in and, there it was...my perfect "calendar" shot.  The funny part was, we had to hold our arm out the tiny bathroom window to get the shot.  I wonder how many tourists have done the same thing!  And we had to wait until the cruise boat went behind the church, so it wouldn't be in the picture.

Now that we have a little monkey, we don't go places like this... maybe again someday (and good thing they're worth it)!


I need to come up with a name for this dessert I made last month.  It's something along the lines of "Filled Angle Food Cupcakes." They're like twinkies.  Only better, if that's possible.  This picture doesn't do them justice. 


They're great with strawberries.  Don't you just love it that strawberries are in season?


I got the cupcake recipe here.


Made the batter...


Filled the cupcakes...


After baking them, I cut a little "x" in the center of each. 


Then made the filling (about 1 c heavy whipping cream, 1/2 c powdered sugar, and vanilla).  I piped the filling from a plastic bag with the tip cut off.  They ended up looking like this. 


Any ideas for a creative name?
Apr 25, 2010

Random Projects

 Good morning!


I hope you are having a nice weekend.  It's rainy here but that hasn't stopped us from having fun.  Yesterday we had breakfast with friends, dinner with friends, and a little nap and housework in between.  Today we are having scrambled eggs and pureed pears/bananas for breakfast (for some reason, Callie won't eat pears or bananas unless they are pureed). 

Not too much to report here, but I hope it's sunny again this week and I also hope to get a baby pool for our deck sometime soon!

Here's a few random projects I've been eyeing.  This DIY chandelier project...making a modern-looking shade chandelier from an ugly brass one.  So cool.


And these shirts are a nice Crewcuts-inspired DIY project. 


So on a totally unrelated note, what is your opinion on wallpaper?  Is it totally out-dated, or back in style?  I'm considering wallpapering our master bathroom...I would love to do something like this trellis print in grey/silver. Do you think that would look good?  I'm liking wallpapered bathrooms lately. 


Well, that's all I've got, folks.  Have a nice Sunday and we'll be back soon!
Apr 24, 2010

Playing with Chalk

Outside!

That's where we've been lately.  I am absolutely loving this beautiful weather, and Callie is absolutely loving playing on our deck.  When we moved in, the people before us put a built-in gate on the top of the stairs, so it's the perfect play-place for the munchkin.

We had our first experience with chalk!


And I finally got around to hanging up our globe lights on our deck that I bought at an after-Christmas sale.  I'm looking forward to taking some pictures out there at night with the lights on.  I'm also looking forward to eventually getting some patio furniture out there (besides our camping chairs, I mean)!  However, it will be hard to rationalize getting new patio furniture when our (temporary) dining table was found at a thrift store for $25.  Maybe I can find some patio furniture at a thrift store too?  :)


Last week I got two HUGE bags of clothes from a friend whose daughter {Savannah} is a few years older than Callie.  This has been such a blessing to us...everything from swimsuits to pajamas to shoes!  And an added bonus, she has amazing style (both the mother and the daughter do)!  I love that she shops for her kids at H&M.  If you haven't scoped out their baby/kids' section, you might want to.  There are some cute things and great prices. 


How do you teach your kids not to eat chalk? Or crayons?  Or flowers...?


Last week, a photographer friend that I met at our MOPS group came over to give me some photography pointers.  Wow, that was so nice of her.  Are you ever just blown away at the kindness of people you don't even know that well?  I've been using all of her tips; it's been great and hopefully you will be able to see an improvement in my photos.  I've been shooting on manual for awhile now, but there are a few things (like ISO) that I didn't feel like learning.  But now I'm understanding it all more, and it's coming together!  So thank you Annie for the help!


Callie discovered her belly button.  She pulls up her shirt, pushes it and laughs really loud like she thinks it's hilarious.  I never want to forget these days. 


I don't want to ever forget how sweet you are, Callie.  I don't ever want to forget how, when I pick you up and pat your back when you are hurt or crying, that you pat my back too. 


I don't ever want to forget your sweet, slobbery kisses you give with your mouth wide open a poke your teeth into our cheeks.


You are the sweetest baby in the whole wide world.  I am loving every moment with you (well, except the major, major tantrum she had at TJ Maxx this week)!


Apr 23, 2010

glitches + a few random tips


I'm so sorry, I think I had some glitches in the codes I've been giving to you!

  • I got a few messages that nothing was happening when you tried following the tutorial for background patterns.  I think I've fixed it, so let me know if it still doesn't work.  

  • A friend asked me to add a favicon to her blog.  My own instructions didn't work for myself!  So sorry if you tried for 40 minutes and still didn't get it.  :)  You're not crazy (but maybe I am)!  So if you still want to add a favicon, that code is fixed now too.  God has a humorous way of keeping me humble, again and again.  ;)

A few other things...

  • If you want to add large pictures, here's a new (and easier) way that I learned from an anonymous commenter.  "Go to settings, Under the Basic tab scroll all the way to the bottom under Global settings and click on "Updated Editor". Then from there you will download your pictures straight to your blog and it gives you the option to make your pictures a tad bit bigger than what you're posting them as now."  Thanks so much for the tip, I wish I could give you credit!  :)
Now if you still have trouble with anything, please let me know and I will see what I can do.  :)  And wow, thanks to b + k for the amazing compliments.  :) 

Have a great weekend!

Callie's Favorite Things...Meal Time Edition


Is meal time as crazy around your house as it is at mine?  Every meal has turned into a battle...Will she eat her vegetables?  (no.)  Will she throw all of her food on the floor?  (yes.)  Will I give in and give her what she wants?  (sometimes.)

Here are a few baby items that we have found super helpful at mealtime.  Don't you just love a great invention?

1. { Munchkin's Stainless Steel Straw Cup }We actually just got this yesterday at Target at Callie's already loving it.  Since our transition from bottles to cups hasn't been too easy, Amanda mentioned she might like a straw cup instead of the classic sippy cup.  She was right, Callie likes it!  And the best part is, it's insulated. 

2.  { Foogo by Thermos leak-proof sippy cup with handles } Another great invention because it's insulated.  It seems we're always bringing milk on the go, and an insulated one would be great for long car trips or day trips in the summer so milk won't spoil. 

3.  {KALAS 18-pc cutlery set by Ikea.}  A friend recently recommended this to me.  Don't you just love Ikea's prices?  At only $1.99 for the set, they are probably cheaper than disposable cutlery!  I think I'm going to get this.  While I'm there, I'll get the plates as well. 

4.  {Baby Bjorn soft bib}    Wipeable bibs have changed our lives laundry habits. These are so great because they just rinse clean and can even be thrown in the dishwasher (we also like the Kiddopotamus one).  The best thing about them?  Well since Callie's stroller doesn't have a snack tray, I just put on her bib and fill in with food like cheerios, clementines, etc.  Then she can reach for them herself and doesn't have to ask for more. So nice!  

5.  { Boon Squirt Baby Food Spoon } We got this as a present from a friend and I think it's such a great idea!  Not only is it easy to feed a young baby, but now Callie can feed herself, without the mess!  I have seen them in baby boutiques and I think Target sells them now too. 

6.  { Munchkin Fresh Food Feeder } So probably every mom already knows about this one, but I had to list it.  This was sooo great when Callie was getting her front teeth in.  I bought a big bag of frozen mango pieces and she would chew/suck on them in this mesh feeder. 

7.  { Babycubes } The last item on my list is something I found at Babies R Us.  Because we made our own baby food, these were handy to take food on-the-go.  I would make a bunch of sweet pototoes, for insatnce, then fill the babycubes and freeze.  So easy for on-the-go (or just at home).  Similar to ice-cube trays, but easier to take with.  They are BPA-free, too!

xoxo
nealy (& callie)
Apr 22, 2010

:: How to Add a Background Pattern :: Tip #6

Adding a background pattern to your blog can be done in just a  few easy steps.

1.  Find a pattern
2.  Upload it
3.  Add it to your blog's HTML


1.  Find a pattern.  Patterns can be any size, but smaller works best so your page doesn't take too long to load. Keep in mind that it will repeat across your background, so it must be seamless (ie, when the pattern repeats, it will look continuous).  Patterns can be found anywhere online, on your computer, or you could make your own.  A site that I really like is Pattern Coolor.  It's essentially a pattern generator, and the colors and sizes can all be personalized and downloaded. Now that you've found a pattern, save it on your computer.
 
2.  Upload it to an image hosting site (like Picasa or Flickr).  Then you want to remember the photo's url address.  Here's my current pattern so you can see what it will look like.


3.  Edit HTML Next you want to edit your blog's HTML by going to Layout>Edit HTML.  Find where it says this:


Now replace all the above with this following code. 


4.  Replace   Don't forget to replace your photo's url wthere is says YOUR PHOTO'S URL - keep the parenthesis.  Now hit preview and make sure it shows your background pattern. 

Hope this works!  Have fun and feel free to link back to my blog.  :)  Let me know if you have any problems with this too - I would be glad to help.  

xoxo
nealy

**updated post**

If the above directions aren't working for you, sdouble check that your image you uploaded starts with "http" and ends in either .jpg or .png.

Here are some alternate instructions you can also try.  Find the body section and paste url(YOUR PHOTO'S URL) where it's shown below.


Good luck!
Apr 18, 2010

Memory Lane & Cream Cheese Flan


It was a good weekend!  We had so much fun with our friends that came to stay with us.  We finally introduced our daugthers and they got along GREAT.  It was so fun to let them play together. 

We took the girls to the zoo.  I think their favorite part was the goldfish that were in the botanical gardens.  Callie kept trying to run away by herself to look at them, again and again.  She even wasn't afraid to stick her hand in the water and touch them.  Too bad she's not quite that brave on the swings yet!


Senna also loved the fish.  Isn't she the sweetest?  Her little bow was a gift from Callie (from Target).  She's going to be a big sister in July, so hanging out with Callie was maybe a little practice for her future!


We had lots of laughs, lots of food, and even more fun.  We took a walk down memory lane (okay lots of walks down memory lane).  And even took a walk back to the park!


Since I'm usually the one behind the camera, I think I can count on one hand the number of "mommy-daughter" pictures I have with Callie.  I'm going to try and make more of an effort to get more pictures with her, despite the fact that I always feel dumb asking people to take my picture.  

On to other news, we're almost totally done with {only} the second room in our house...Callie's room (here's the first room that's completely finished).  I wasn't lying when I said I'm working on at least three different projects at once...at a minimum!  I have just  a few more finishing touches on the bedroom, and then you can see it.  I just finished making some curtains for her room too....sewing has somehow become a new hobby, thanks to my friend Ranya {she's been like my mentor mom in all things domestic}.  I've been trying to convince her to start a(nother) blog to showcase all of her amazing talent, but unfortunately I don't think it's going to happen. So I will just have to share with you all of the things she's taught me!  :)

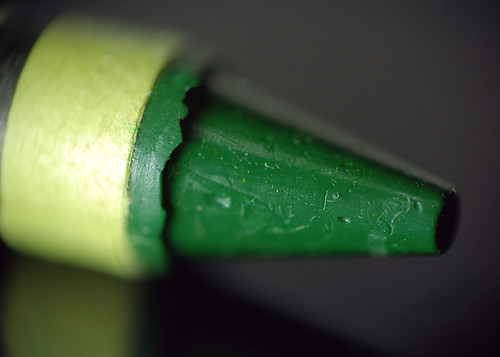
Okay, I've got to go finish painting the last coat of paint on our last pieces of trim in our house...I think we may have to celebrate when we are finished!  Please take my advice  and DO NOT attempt to paint all of the trim in a 5-br house.  If you want to stay sane, that is.  And some days I'm not so sure that I am!  ;)  Callie's currently eating the green crayon I gave her to color.  And the paper is on the floor.  And her highchair tray is green. 

As promised, here is my Puerto Rican friend's recipe for flan.  It did not disappoint!


First you throw four eggs in the blender and blend. 


Then you add the cream cheese, evaporated milk, sweetened condensed milk, and 1/2 cup of sugar.  Once these things are blended, you set aside and make the caramel sauce.  This is where you combine sugar and water and cook.

The picture above is what it's supposed to look like.  The first time I did it, I think I cooked it too long because the sugar started to crystallize again.  So I had to start over, and got it the second time.  Good thing sugar is cheap!

After making the caramel sauce, pour in the bottom of a Pyrex pan or two to coat.


Then, just pour the blender mixture in the pan and bake!  Lots of creamy, sweet goodness.  If you like cheesecake, you will LOVE this dessert.

Cream Cheese Flan

4 eggs
1 8oz cream cheese (whipped)
1 can evaporated milk
1 can sweetened condensed milk
1/2 c sugar

1 c sugar
1/2 c water

(This recipe makes one standard size pie pan plus enough for a smaller one, or one 13x13 glass pan) Preheat oven to 350.  Blend eggs in blender, then add next four ingredients.  

In saucepan, mix 1 c sugar and 1/2 c water thoroughly, then heat to medium-high. Boil 10-15 minutes, stirring constantly.  When mixture turns slightly golden, remove from heat and add to coat pyrex pan.  Next, pour egg/cream cheese mixture to pan.  

To bake, set pan in a larger pan with about 1 inch of water.  Bake until knife comes clean, around one hour. 


Blog Template by BloggerCandy.com